Photography is the art of capturing light. However, when the light diminishes or is scarce, it becomes a challenging task for photographers. Night and low light photography can be a tricky field, but it’s worth the effort. When done right, it can produce breathtaking images. In this article, we will explore the techniques and equipment required for successful night and low light photography.
Camera Settings:
The first and foremost thing to consider when doing night and low light photography is camera settings. The two most critical camera settings to consider are shutter speed and aperture.
Shutter Speed:
Shutter speed determines how long the camera sensor is exposed to light. The longer the exposure time, the more light enters the camera sensor. Therefore, in low light situations, a slower shutter speed is necessary. However, a slow shutter speed can cause blur in the image due to camera shake or movement. The general rule of thumb is to keep the shutter speed above the focal length of the lens. For example, if using a 50mm lens, the shutter speed should be at least 1/50th of a second. In some cases, a tripod or image stabilization can help to avoid camera shake.
Aperture:
Aperture determines the amount of light that enters the camera lens. A wider aperture (lower f-stop number) lets more light in, while a narrower aperture (higher f-stop number) restricts light. However, a wider aperture also affects the depth of field (DOF). A shallow depth of field can create beautiful bokeh (blurred background) but can also make focusing challenging. Therefore, the best approach is to experiment with different aperture settings to find the right balance between light and DOF.
ISO:
ISO measures the camera’s sensitivity to light. A higher ISO setting increases the camera’s sensitivity to light, which allows for a faster shutter speed and a narrower aperture. However, it also increases the digital noise in the image, which can affect image quality. Therefore, it is essential to find the balance between ISO and the desired image quality.
Focus:
Focusing can be challenging in low light situations. Autofocus can struggle to find the subject, so it is recommended to switch to manual focus. Using a flashlight or a focusing aid can help to ensure sharp focus. It is also helpful to use the camera’s live view mode to zoom in and check the focus.
Equipment:
The right equipment can make a significant difference in night and low light photography.
Tripod:
A tripod is an essential piece of equipment for low light photography. It helps to keep the camera steady, avoiding camera shake and blur in the image. It is recommended to use a sturdy tripod to ensure stability, particularly in windy conditions.
Remote Shutter Release:
A remote shutter release allows you to take a photo without touching the camera, which helps to prevent camera shake. It is particularly useful when using a tripod.
Flash:
Using a flash can help to add light to a scene, particularly when photographing people or objects in the foreground. However, it can also create harsh shadows and wash out the background. Therefore, it is essential to experiment with flash settings to find the right balance.
Lens:
Choosing the right lens for night and low light photography can make a significant difference. A lens with a wide maximum aperture (low f-stop number) allows more light in, making it easier to capture images in low light. Prime lenses, such as 50mm or 85mm, are popular choices for low light photography.
Composition:
Composition plays a crucial role in creating a compelling image, regardless of the lighting conditions. However, in low light situations, it becomes even more critical.
Here are some composition tips for night and low light photography:
Use Leading Lines:
Leading lines can guide the viewer’s eye through the image and create a sense of depth. They can be particularly effective in low light photography, where the lack of light can make the image appear flat.
Experiment with Reflections:
Reflections can add interest and depth to an image, particularly in low light situations. Look for reflective surfaces, such as water or glass, and experiment with different angles and compositions.
Find Light Sources:
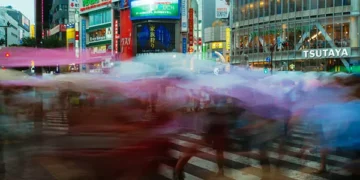
In low light situations, finding sources of light can help to create an interesting image. Look for street lamps, car headlights, or other light sources that can add a dramatic effect to the image.
Use Silhouettes:
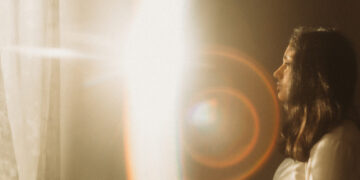
Silhouettes can be particularly effective in low light situations. Look for subjects with a distinct shape or outline and position them against a bright light source.
Use a Wide Angle Lens:
A wide-angle lens can capture more of the scene, which can be particularly useful in low light situations. It can also add a sense of scale and depth to the image.
Post-Processing:
Post-processing is an essential part of any photography workflow, and night and low light photography are no exception.
Here are some post-processing tips for night and low light photography:
Reduce Noise:
Low light images can have a significant amount of digital noise. Using noise reduction software can help to reduce noise and improve image quality.
Adjust Exposure:
Adjusting the exposure in post-processing can help to bring out the details in the shadows and highlights.
White Balance:
The white balance can affect the color temperature of the image. Experimenting with different white balance settings can help to create the desired mood and atmosphere in the image.
Crop and Straighten:
Cropping and straightening can help to improve the composition of the image and create a more balanced composition.
Conclusion
Night and low light photography can be challenging, but it can also be a rewarding and creative field of photography. Understanding camera settings, using the right equipment, and experimenting with composition and post-processing can help to create stunning images in low light situations. With practice and patience, you can master the art of night and low light photography and capture the beauty of the world after dark.
Tips for Night and Low Light Photography
Here are some additional tips for night and low light photography:
-
Scout Locations:
Scouting locations beforehand can help you to identify the best places to capture night and low light images. Look for places with interesting light sources, such as street lamps or neon signs, or areas with reflective surfaces, such as water.
-
Use a Tripod:
A tripod is an essential piece of equipment for night and low light photography. It helps to keep the camera steady and avoid camera shake, which can cause blur in the image. It is recommended to use a sturdy tripod to ensure stability, particularly in windy conditions.
-
Experiment with Manual Focus:
In low light situations, autofocus can struggle to find the subject. Switching to manual focus can help to ensure sharp focus. Using a flashlight or a focusing aid can help to ensure accurate focus.
-
Use the Right Lens:
Choosing the right lens for night and low light photography can make a significant difference. A lens with a wide maximum aperture (low f-stop number) allows more light in, making it easier to capture images in low light. Prime lenses, such as 50mm or 85mm, are popular choices for low light photography.
-
Use Slow Shutter Speeds:
Using slow shutter speeds can help to capture the ambient light in the scene, creating a more dramatic effect. However, it is essential to use a tripod and image stabilization to avoid camera shake.
-
Shoot in RAW:
Shooting in RAW allows for more flexibility in post-processing. RAW files retain more information than JPEG files, which allows for more significant adjustments in exposure and white balance.
-
Use the Histogram:
The histogram is a graphical representation of the tonal values in the image. It can help to ensure that the exposure is correct and avoid overexposed or underexposed images.
-
Be Patient:
Night and low light photography can be a slow process. Take your time and experiment with different settings and compositions. Don’t be afraid to take multiple shots and adjust your settings as needed.


